
Beginner Guide to Product Photography: Capture Stunning Product Images for Your Online Store
You want to capture stunning product photos for your online store, but don’t know where to begin? Great product images are super important for selling things online. This beginner guide to product photography will show you exactly how to make your products look amazing. You’ll learn simple tricks to take professional-looking pictures, even with just your phone.
Get ready to transform your online store product images and attract more customers. Good photos build trust and make people want to buy what you’re selling. Let’s dive into the world of amazing ecommerce product photography tips!
Why Good Product Photos Matter for Your Online Store
Imagine you’re shopping online for a new gadget or a cool piece of jewelry. Which product would you choose: the one with blurry, dark photos, or the one with bright, clear, and attractive pictures? You would definitely pick the clearer option. That’s why stunning product photos are so important.
Your product images are the first thing customers see on your website. They help shoppers understand what your product looks like and what it can do. This visual presentation is a huge part of successful ecommerce visual marketing.
Good photos make your products stand out from the competition. They tell a story and build trust with your potential buyers. Clear, high-quality pictures can even make your products seem more valuable and desirable.
Poor photos, on the other hand, can make customers think your product is low quality or that your store isn’t trustworthy. This can lead to people leaving your website without buying anything. So, investing a little time in learning how to take product photos can really pay off for your business.
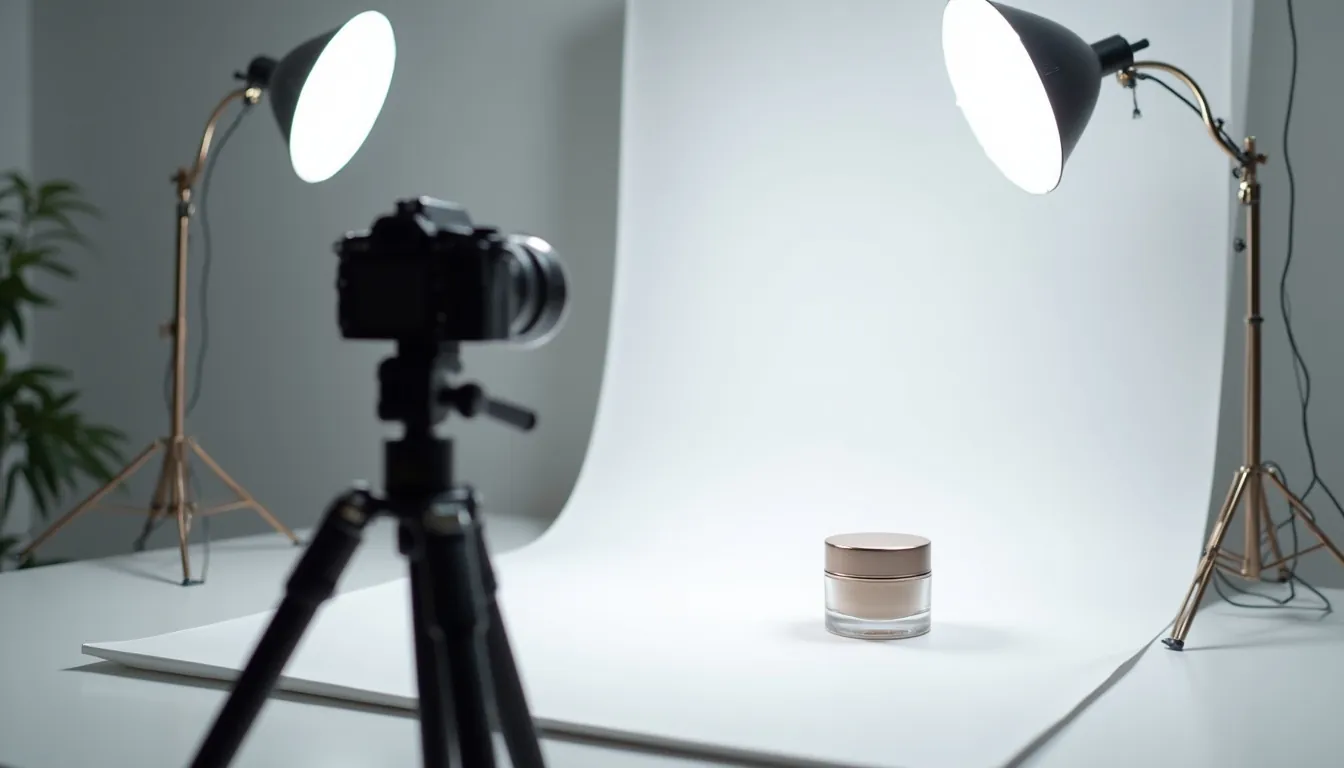
Getting Started: Your Basic Product Photography Setup
You don’t need a fancy studio to take great product photos. Many amazing online store product images can be captured with simple tools you might already own. This product photo setup guide will walk you through the essentials. You will be surprised how little you need to start your journey in product photography for ecommerce beginners.
Camera Choices: What to Use
You might be wondering what camera is best. The truth is, the best camera is the one you have with you. You can start creating stunning product photos right now.
Your Smartphone: A Powerful Tool
Modern smartphones have incredible cameras that are perfect for product photography. They are easy to use and always with you. You can take great shots without needing complex settings.
Always make sure your phone’s camera lens is clean before you start shooting. A little smudge can make your photos blurry. Hold your phone steady or use a small tripod for sharp images.
DSLR or Mirrorless Camera: For More Control
If you have a DSLR (Digital Single-Lens Reflex) or a mirrorless camera, you’ll have more control. These cameras let you change settings like aperture and shutter speed. This means you can get very specific looks for your photos.
However, these cameras can be more complicated to learn. Start with automatic settings if you’re new, then slowly explore manual modes. The goal is to get clear, well-lit photos, regardless of the camera.
Lighting Essentials: Brighten Your Products
Good lighting is the single most important part of great product photography. It makes your items look their best. Without good light, even the best camera struggles.
Natural Light: Your Best Friend
The easiest and often best light source is natural window light. Find a window that gets bright, but not direct, sunlight. Direct sun can create harsh shadows.
Place your product near the window, but not directly in the sun’s path. Early morning or late afternoon light is usually softer and more flattering. This simple trick is an essential ecommerce product photography tip.
Artificial Light: When Natural Light Isn’t Enough
Sometimes, natural light isn’t available or isn’t enough. In these cases, artificial lights can help. You don’t need expensive studio lights. A desk lamp with a white lampshade can work.
Softboxes are special lights that spread light evenly and softly. You can also buy small LED light panels that are affordable and easy to use. The key is to avoid harsh, direct light from a single bulb.
Light Tent or Light Box: For Even Lighting
A light tent, also called a light box, is a fantastic tool for beginners. It’s a small tent with translucent sides that diffuses light. You place your product inside, and it helps create very even, shadow-free lighting.
You can buy these online for a reasonable price, or even make a simple DIY version. This is one of the best ecommerce product photography tips for consistent results. They are truly great for capturing stunning product photos.
Backgrounds: Keep it Simple
The background of your product photo should never distract from the product itself. A clean, simple background helps your product stand out. White or light gray backgrounds are usually best.
You can use a large piece of white paper, poster board, or a white sheet. Create a “sweep” by curving the paper up from the table to the wall. This makes the background look seamless. This is a crucial step in any product photo setup guide.
Tripod: For Sharp, Consistent Shots
A tripod holds your camera perfectly still. This is super important for getting sharp, clear photos, especially in lower light. It also helps you take consistent photos from the same angle every time.
You can get small, affordable tripods for smartphones or larger ones for DSLRs. Even a small phone tripod makes a big difference in the quality of your online store product images. Try to use one whenever possible.
Mastering the Shot: Essential Product Photography Techniques
Now that your setup is ready, let’s talk about how to actually take those pictures. This section will guide you through the process, helping you learn how to take product photos that truly shine. These ecommerce product photography tips will elevate your game.
Setting Up Your Shot: Ready, Set, Shoot!
Before you even touch your camera, do some prep work. This makes a big difference. This part of the product photo setup guide focuses on getting everything just right.
Clean Your Product
Make sure your product is spotless. Dust, fingerprints, or smudges will show up clearly in photos. Use a microfiber cloth to wipe it down. If it’s clothing, iron out any wrinkles.
Even small imperfections can distract customers. A clean product looks professional and appealing. This simple step is vital for stunning product photos.
Steady Your Camera
Use your tripod! It keeps your camera perfectly still, preventing blurry photos. If you don’t have a tripod, lean your phone or camera against something stable. Even a stack of books can help.
A steady camera is key for sharp online store product images. This applies whether you’re using a smartphone or a professional camera.
Framing and Composition
Composition is how you arrange everything in your photo. Try to center your product or use the “rule of thirds” for a more dynamic look. The rule of thirds means imagining lines dividing your photo into nine equal boxes. Place your product along these lines or at their intersections. This is a great ecommerce product image tip.
Leave some space around your product so it doesn’t look cramped. This space is called “negative space” and helps your product stand out. Don’t cut off parts of your product in the photo.
Lighting Techniques: Beyond Basic Light
Good lighting isn’t just about having light; it’s about using it smartly. Here are some key ecommerce product photography tips for lighting. This is crucial for product photography for ecommerce beginners.
Using Natural Light Effectively
When using window light, place your product slightly to the side of the window, not directly in front of it. This creates soft shadows that give your product shape and depth. If the light is too bright, you can put a thin white curtain over the window to diffuse it.
You can also use a white foam board or reflector to bounce light back onto the product. This fills in shadows on the side of the product furthest from the window. This simple trick can make a huge difference in your stunning product photos.
Avoiding Harsh Shadows
Harsh shadows can make your product look less appealing. To soften shadows, use a diffuser between your light source and the product. A thin white sheet or translucent umbrella can act as a diffuser.
Also, try using two light sources, one on each side, or a light source and a reflector. This evens out the lighting and reduces deep shadows. Even with just natural light, a reflector can dramatically improve your shots.
Diffusers and Reflectors
- Diffuser: Spreads out light, making it softer and less harsh. You can buy photographic diffusers, or use a thin white sheet, parchment paper, or even a white plastic bag.
- Reflector: Bounces light back onto your product to fill in shadows. White foam board, a piece of white cardstock, or aluminum foil (crinkled then smoothed for a softer bounce) work great.
- Placement: Place the reflector on the opposite side of your main light source to bounce light into the shadowy areas. This helps to create more balanced lighting for your online store product images.
Angles and Perspectives: Showcasing Every Detail
Different angles can highlight different features of your product. Don’t just take one type of shot. Vary your angles to give customers a complete view.
Eye-Level Shots
These are common and natural. Place your camera at the same height as your product. This is great for showing what the product looks like head-on. Most online store product images use this angle.
Overhead Shots (Flat Lays)
For flat products like clothing, art prints, or food, an overhead shot works well. Position your camera directly above the product. This creates a clean, graphic look. Make sure your camera is perfectly parallel to the ground to avoid distortion.
Detail Shots
Zoom in on unique features, textures, or important parts of your product. If it’s a handmade item, show the craftsmanship. If it’s a piece of tech, show the ports or buttons. These close-ups add value and information. This is an important ecommerce product image tip for helping customers understand quality.
Angled Shots
Shoot from a slight angle, either above or below. This can add dynamism and show more dimensions of your product. Experiment to see what looks best for your specific item.
Focus and Depth of Field: Make Your Product Pop
Getting your product in sharp focus is non-negotiable. Blurry photos are unprofessional and hard for customers to look at.
Keeping the Product Sharp
Always tap on your product on your smartphone screen to set the focus. On a DSLR, ensure your focus point is directly on the product. Double-check your focus before taking the picture. A tripod will also help immensely in maintaining sharp focus for your stunning product photos.
Blurring Backgrounds (Bokeh)
A blurry background (called bokeh) can make your product really stand out. This is often achieved with cameras that have a wide aperture setting (like f/1.8 or f/2.8). Smartphones can sometimes simulate this with “Portrait Mode.”
To get a blurry background, place your product further away from the background. Also, get your camera closer to the product itself. This creates a shallower “depth of field,” meaning only your product will be in sharp focus.
Different Types of Product Shots
To truly provide a comprehensive view of your product, you’ll need more than just one photo. Here are several types of shots you should consider for your online store product images. This is a great ecommerce product photography tip for product pages.
Hero Shots: The Main Attraction
This is your primary image, the one that first catches the customer’s eye. It should be perfectly lit, sharply focused, and show the product clearly against a clean background. Think of it as the star of your product page. This is usually the first image people see on your store, so it needs to be a stunning product photo.
Detail Shots: Close-Up and Personal
These photos highlight specific features, textures, or intricate designs. If your product has a unique stitch, a special button, or a particular material, show it off. Detail shots build confidence and help justify the price. They answer questions customers might have about quality.
Lifestyle Shots: Product in Action
Show your product being used by a person or in a natural setting. If you sell mugs, show someone enjoying coffee in one. If you sell backpacks, show someone wearing it on a hike. Lifestyle shots help customers imagine themselves using the product and connect with it emotionally. This is a powerful ecommerce visual marketing strategy.
Scale Shots: How Big Is It Really?
Customers often struggle to understand the size of a product from a photo. Include an item of known size next to your product to provide context. A hand holding the product, a coin, or a ruler can help. This is a simple but effective ecommerce product image tip.
Group Shots: Selling a Set
If you sell products in sets or collections, a group shot is essential. Arrange them aesthetically, perhaps showing how they complement each other. This is great for bundles or variations of a product.
360-degree/Video: An Advanced View
For a truly immersive experience, consider 360-degree spins or short product videos. These allow customers to explore your product from every angle. While more advanced, they can significantly boost engagement and sales. This is a next-level step in product photography for ecommerce beginners.
Editing Your Product Photos: The Finishing Touch
Once you’ve taken your photos, the work isn’t quite done. Editing is crucial for making your online store product images look polished and professional. It’s like putting on the final touches before presenting your masterpiece. This section gives you important ecommerce product photography tips for post-production.
Why Edit? Consistency and Professionalism
Editing helps correct small imperfections, brightens your images, and ensures all your photos have a consistent look. Consistency is key for brand recognition and making your store look professional. It ties all your stunning product photos together. A well-edited photo creates a much better impression than an unedited one.
Basic Editing Software: Tools You Can Use
You don’t need expensive software to start editing. There are many great free and paid options available.
Free Options: Get Started Without Spending
- Snapseed: A powerful mobile editing app by Google. It’s intuitive and has many professional-grade tools. Great for editing on the go.
- GIMP: A free, open-source desktop image editor. It’s very powerful, almost like a free version of Photoshop, but can have a steeper learning curve.
- Photopea: A free online editor that works in your web browser. It looks and feels very much like Photoshop, making it powerful for web-based editing.
- Canva: While primarily a design tool, Canva also offers basic image editing features. It’s very user-friendly for quick adjustments.
Paid Options: For More Power
- Adobe Lightroom: Excellent for organizing and editing large batches of photos. It’s powerful for color correction, exposure adjustments, and overall image enhancement. Many professional photographers use it.
- Adobe Photoshop: The industry standard for image manipulation. It’s great for detailed retouching, removing backgrounds, and complex edits. It has a steeper learning curve than Lightroom.
- Affinity Photo: A one-time purchase alternative to Photoshop, offering many similar features at a lower cost. It’s a powerful tool for advanced editing.
Key Editing Steps: What to Adjust
Here are the essential steps you should take when editing your product photos. These are fundamental ecommerce product photography tips.
Cropping and Straightening
First, crop your photo to focus on the product and remove any unnecessary background. Straighten the image if it’s slightly tilted. A straight horizon line or product orientation makes the photo look more professional. Ensure your product is centered or placed according to your composition rules.
Brightness and Contrast
Adjust the brightness (exposure) to make sure your product is well-lit but not overexposed (too bright). Increase contrast slightly to make colors pop and details sharper. Be careful not to overdo it, as too much contrast can make the image look unnatural.
Color Correction (White Balance)
White balance corrects the color cast in your photos. Sometimes photos can look too yellow, blue, or green. Adjusting the white balance makes white objects appear truly white, ensuring accurate product colors. This is especially important for clothing or products where color accuracy is crucial.
Removing Dust/Imperfections
Use a spot healing brush or clone stamp tool to remove any dust, lint, or minor blemishes on your product or background. Even if you cleaned your product well, tiny bits can still appear in high-resolution photos. This step ensures truly stunning product photos.
Sharpening
A slight sharpening can make your product details crisp and clear. Don’t over-sharpen, as it can introduce noise or make edges look pixelated. A little goes a long way. This is a final touch for professional online store product images.
Optimizing Your Online Store Product Images
Taking and editing great photos is only half the battle. You also need to optimize them for your online store. This means making sure they load quickly and are easy for search engines to find. This section gives you important ecommerce product photography tips for your website.
File Formats and Sizes: Speed and Quality
The way you save your images can impact your website’s performance and how good your photos look. This is an important ecommerce product image tip.
JPEG vs. PNG
- JPEG (.jpg): Best for photographs with lots of colors and gradients. It’s a “lossy” format, meaning it compresses images by removing some data, but it results in smaller file sizes. Most of your product photos will be JPEGs.
- PNG (.png): Best for images with transparency (like logos) or sharp lines and solid blocks of color. It’s a “lossless” format, meaning it doesn’t lose data during compression, but files can be larger. Use PNG for images where quality and transparency are critical, like overlays or icons.
Compression for Web
You need to compress your images to reduce their file size without significantly losing quality. Large image files slow down your website. Slow websites frustrate customers and can make them leave. Use online tools like TinyPNG or compressor.io, or features within your editing software, to compress images for the web. Aim for images that are clear but load fast.
Speed vs. Quality
It’s a balance. You want high-quality images that showcase your product, but they also need to load quickly. As a general rule, aim for image files under 200KB for product pages. Your e-commerce platform might also have recommended image sizes and dimensions. Follow their guidelines for the best results for your online store product images.
Image SEO: Help Customers Find You
SEO (Search Engine Optimization) isn’t just for text; it’s for images too! Optimizing your images helps search engines understand what they are and show them to potential customers. This is a powerful ecommerce visual marketing strategy.
Alt Text
Alt text (alternative text) is a short description of your image. It helps visually impaired users understand the image and tells search engines what the image is about. Always include relevant keywords in your alt text, but make sure it still describes the image accurately.
- Bad Alt Text:
image.jpgorproduct - Good Alt Text:
Red leather wallet with multiple card slotsorHandmade ceramic coffee mug with blue glaze
File Names
Before you upload an image, rename the file. Instead of IMG_0045.jpg, use descriptive names that include keywords.
- Bad File Name:
product1.jpg - Good File Name:
beginner-guide-product-photography-camera-setup.jpgorblue-ceramic-coffee-mug.jpg
Consistency Across Your Store: A Cohesive Look
Consistency in your product photography builds trust and strengthens your brand. All your online store product images should look like they belong together.
Branding
Your photos should reflect your brand’s style. Do you want bright and airy, or dark and moody? Do you use props? Decide on a style and stick to it. This applies to lighting, background, and editing.
Customer Experience
When customers browse your store, they appreciate a consistent visual experience. It makes your store look professional and easy to navigate. Inconsistent photos can make your store seem unorganized or less credible. So, always aim for a unified look across all your stunning product photos.
Common Mistakes to Avoid
Even with the best intentions, it’s easy to make mistakes when you’re just starting. Knowing what to avoid can save you a lot of time and frustration. Here are some common pitfalls in product photography for ecommerce beginners.
Bad Lighting
The number one mistake! Photos that are too dark, too bright, or have harsh shadows make products look unappealing. Always prioritize good lighting. Remember, natural window light and a reflector are your best friends for stunning product photos.
Cluttered Backgrounds
A messy background distracts from your product. Keep your backgrounds clean, simple, and free of clutter. Your product should always be the star of the show. This is a basic ecommerce product image tip.
Blurry Photos
Photos that are out of focus look unprofessional and can’t be used. Always double-check your focus before you press the shutter button. Use a tripod or stabilize your camera to prevent blur. Sharpness is key for online store product images.
Inconsistent Style
If some of your product photos are bright and others are dark, or if backgrounds change constantly, your store will look unprofessional. Aim for a consistent look and feel across all your product listings. This consistency helps with ecommerce visual marketing.
Ignoring Post-Processing
Uploading photos straight from your camera or phone without any editing is a missed opportunity. Even minor adjustments in brightness, contrast, and color can significantly improve your photos. Editing is a crucial step in creating professional stunning product photos.
Only Taking One Photo Per Product
Customers want to see products from different angles, with close-ups, and in use. Providing only one photo leaves them guessing and can reduce their confidence in buying. Always aim for multiple online store product images for each product.
Not Showing Scale
Customers often can’t tell the size of an item from a photo alone. Forgetting to include a reference item or measurements in your photo set can lead to confusion and returns. This is an important ecommerce product image tip.
Advanced Tips for Product Photography for Ecommerce Beginners
Once you’ve mastered the basics, you might want to explore a few more things to take your photos to the next level. These ecommerce product photography tips can help you grow.
Consider a Light Tent or Studio Kit
If natural light isn’t always reliable, a small, affordable light tent or a basic LED studio light kit can be a game-changer. These provide consistent, controlled lighting, making your job much easier. Many great online store product images are created in simple light tents.
Explore Different Props
Carefully chosen props can enhance your lifestyle shots and add context to your product. For example, if you sell handmade soap, a small wooden soap dish or a clean towel could be a good prop. Ensure props don’t distract from the product.
Learn More About Composition Rules
Dive deeper into photographic composition. Learn about leading lines, symmetry, asymmetry, and negative space. These techniques can make your stunning product photos more artistic and appealing. There are many online resources and tutorials on this topic.
Practice Regularly
Like any skill, product photography gets better with practice. The more you shoot, the more you’ll understand lighting, angles, and composition. Don’t be afraid to experiment and try new things. Each session helps you learn how to take product photos even better.
Invest in a Photo Editing Course
While free tutorials are great, a dedicated course on photo editing (for Lightroom or Photoshop) can teach you advanced techniques. This can help you achieve a professional, polished look for all your ecommerce visual marketing.
Tools and Resources
Here are some general recommendations for gear and learning resources that can help you on your journey. These are great starting points for product photography for ecommerce beginners.
Recommended Basic Gear:
- Smartphone Tripod: (e.g., UBeesize, Manfrotto PIXI Mini)
- White Foam Boards: Available at craft stores for less than $5 each.
- Light Tent/Lightbox: (e.g., Neewer, ESDDI brands on Amazon)
- Clip-on LED Lights: Small, dimmable LED lights can be versatile.
- Microfiber Cleaning Cloths: Essential for spotless products and lenses.
External Resources for Learning:
- YouTube Tutorials: Search for “product photography for beginners” or “Lightroom editing tips.” Channels like Peter McKinnon, Jessica Kobeissi, and professional e-commerce photographers offer valuable advice.
- Online Courses: Platforms like Skillshare, Udemy, or CreativeLive offer in-depth courses on product photography and editing.
- Photography Blogs: Many photography websites offer articles and guides on specific techniques. (e.g., Digital Photography School, B&H Photo blog)
- E-commerce Platform Guides: Your specific e-commerce platform (Shopify, Etsy, WooCommerce) usually has guidelines and tips for uploading online store product images.
Conclusion
Congratulations! You’ve taken the first big step in understanding product photography for ecommerce beginners. You now have a solid beginner guide to product photography that covers everything from setting up your shots to editing and optimizing your images. Remember, stunning product photos are not just pretty pictures; they are powerful sales tools.
By applying these ecommerce product photography tips, you can create professional-looking online store product images that attract customers and boost your sales. Don’t feel overwhelmed; start simple, use what you have, and practice often. Every photo you take is a chance to learn and improve.
So, grab your camera or smartphone, set up your simple studio, and start experimenting. Your online store and your customers will thank you for the beautiful ecommerce visual marketing you create. Now you know how to take product photos that truly stand out!
FAQ Section
Q1: What is the most important thing for good product photography?
A1: Good lighting is the most important factor. Even with a basic camera, excellent lighting can make your product look professional. Natural light from a window is a fantastic starting point for beginner guide to product photography.
Q2: Can I really take professional product photos with just my phone?
A2: Yes, absolutely! Modern smartphones have excellent cameras capable of capturing stunning product photos. Focus on good lighting, a clean background, and a steady shot. Many ecommerce product photography tips apply to both phones and professional cameras.
Q3: What kind of background should I use for my products?
A3: A simple, clean background is best. White or light gray seamless backgrounds are popular because they make your product stand out. You can use large sheets of paper, poster board, or even a white bedsheet. This is a core part of any product photo setup guide.
Q4: How many photos should I take for each product?
A4: Aim for at least 3-5 high-quality online store product images per product. Include a hero shot, detail shots, and possibly lifestyle or scale shots. The more comprehensive your visual information, the better. This is an essential ecommerce product image tip.
Q5: Do I need to edit my product photos?
A5: Yes, editing is crucial. It helps correct imperfections, ensure consistent lighting and colors, and gives your stunning product photos a polished, professional look. There are many free editing tools available for product photography for ecommerce beginners.
Q6: What is “alt text” and why is it important for my product images?
A6: Alt text is a short, descriptive text that explains what an image is about. It’s important for SEO (Search Engine Optimization) as it helps search engines understand your image content. It also helps visually impaired users. Using descriptive alt text is a key ecommerce visual marketing strategy.
Q7: My photos look blurry. How can I fix this?
A7: Blurry photos usually happen because of camera shake or incorrect focus. Use a tripod or stabilize your camera to prevent shake. Always tap on your product on your phone screen to set focus, or manually set it on a DSLR. Sharp focus is critical for how to take product photos.
Q8: How can I make my product look brighter without harsh shadows?
A8: Use natural window light and a reflector. Place your product near a window but slightly to the side. Use a white foam board as a reflector on the opposite side to bounce light into the shadows. You can also use a diffuser between the light source and the product to soften the light. These are great ecommerce product photography tips.
Q9: What’s the best way to show the size of my product?
A9: Include a common object with your product in one of the photos for scale, like a coin, a hand, or a ruler. You can also include exact dimensions in your product description. This is a very helpful ecommerce product image tip.
Q10: I’m just starting. What’s the one thing I should focus on first?
A10: Start by mastering natural light. Find a good window, set up a simple white background, and practice getting clear, well-lit shots of your products. This foundation will make all other ecommerce product photography tips easier to learn. Focus on the basics of how to take product photos first.


Leave a comment