
Beginner Guide to Product Photography: Simple Lighting & Setup for Perfect Shots
Beginner Guide to Product Photography: Simple Lighting & Setup for Perfect Shots
Welcome to your ultimate beginner guide to product photography! Getting great photos of your products is super important, especially if you sell things online. You want your items to look amazing, making people want to buy them right away. This guide will show you how to get that perfect lighting setup and create stunning shots without spending a lot of money.
Good pictures help your products stand out from the crowd. They build trust with your customers and show off exactly what you’re selling. Learning the basics of product photography is a skill that will help your business grow.
This comprehensive beginner guide to product photography will walk you through everything. You will learn about simple lighting techniques and easy setup ideas. We will help you take professional-looking pictures right from your home.
Why Good Product Photos Matter
Imagine you’re shopping online for something new and exciting. You click on a product, and the pictures are dark, blurry, or just plain messy. Would you feel confident buying it? Probably not! This is why clear, bright, and beautiful product photos are so important.
Great photos act like a silent salesperson for your products. They grab attention and show off all the best features. Customers can almost feel the product in their hands just by looking at a well-lit image.
Good pictures also make your brand look professional and trustworthy. When your photos are consistent and high-quality, it tells customers you care about your business. This simple step can really boost your sales and make your online store more appealing.
Essential Gear for Beginners
You might think you need fancy cameras and a professional studio for amazing product photos. Guess what? You don’t! You can achieve fantastic results with just a few simple items. This section covers the basic gear that will kickstart your DIY product photography studio.
Your Camera: Smartphone vs. DSLR
You probably already have a powerful camera in your pocket – your smartphone! Modern smartphones take incredibly sharp and detailed photos. They are perfect for starting your beginner guide to product photography journey.
If you have an older smartphone, don’t worry. Just make sure your phone’s camera lens is clean before you start shooting. Many professional product photographers even use their phones for quick shots.
For those who want a bit more control, a DSLR or mirrorless camera offers advanced settings. These cameras let you change things like how blurry the background is or how bright the photo appears. You can learn more about specific camera settings later in this guide.
Tripod: Your Steady Helper
A tripod is one of the most useful tools you can have. It holds your camera perfectly still, preventing blurry photos. Even a tiny shake of your hand can make a picture look soft.
You can find small tabletop tripods or taller full-size tripods. A small, affordable tabletop tripod is excellent for most product photography setups. It keeps your camera steady and helps you take consistent shots from the same angle every time.
Using a tripod also frees up your hands. This allows you to adjust your product or lighting while keeping the camera in place. It’s a game-changer for getting sharp and repeatable results.
Backgrounds: Simple & Clean
The right background makes your product pop and avoids distractions. For beginners, simple backgrounds are usually the best choice. They help your product be the star of the show.
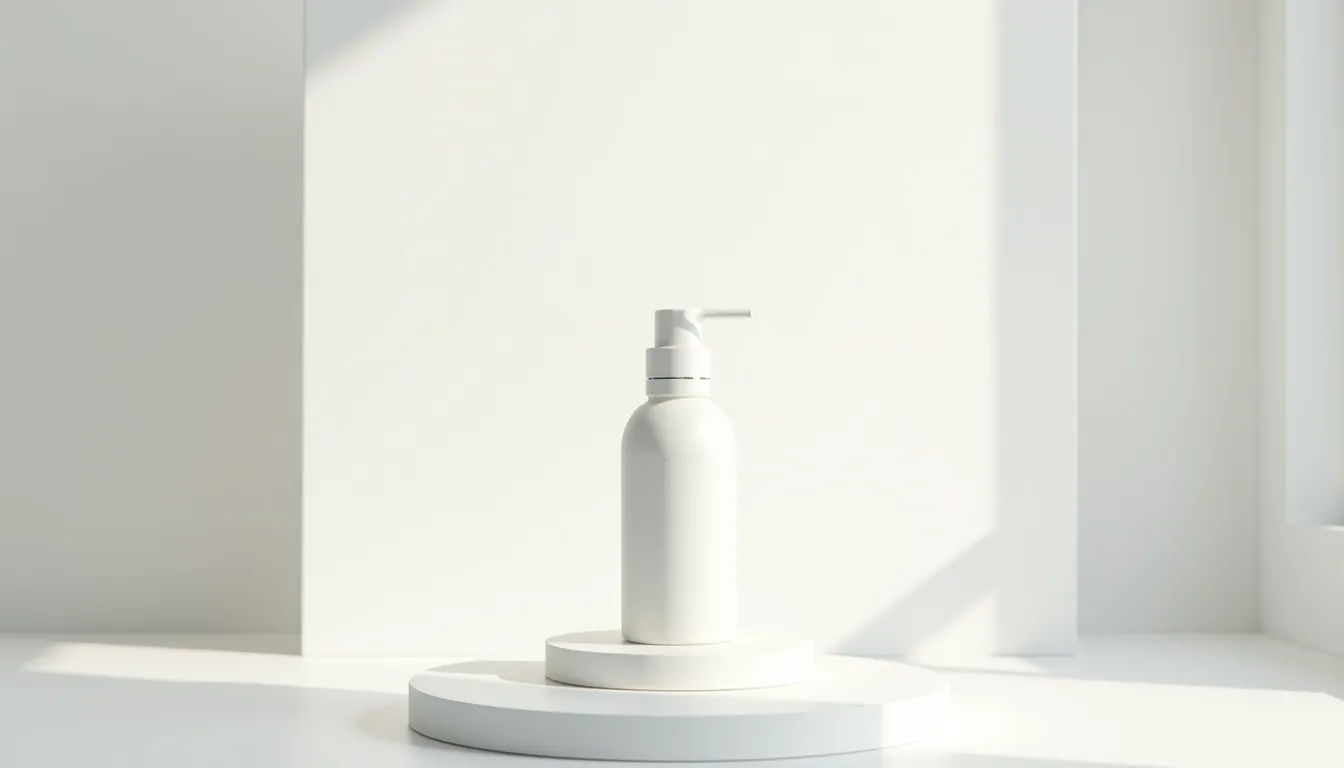
Many photographers start with a plain white or light gray background. You can use large sheets of paper, a clean white poster board, or even a smooth white wall. These options create a clean, professional look that works for almost any product.
You can also experiment with different colors or subtle textures. Just make sure the background doesn’t take attention away from your product. A seamless paper roll creates a smooth, continuous background without any harsh lines.
Reflectors & Diffusers: Light’s Best Friends
These two tools are super important for shaping light, and you can even make them yourself! A reflector bounces light back onto your product, filling in shadows. Think of it like a mirror for light.
A diffuser spreads out harsh light, making it softer and more even. This helps avoid dark, crisp shadows that can make your product look less appealing. Soft light makes products look smooth and professional.
For a DIY reflector, you can use a piece of white foam board, a sheet of aluminum foil crinkled and then smoothed out, or even a white bed sheet. For a DIY diffuser, parchment paper, a thin white curtain, or a white plastic shower curtain can work wonders. These simple tools are key for product photography lighting tips.
Mastering Product Photography Lighting
Lighting is the secret sauce to amazing product photos. It can make your products look shiny, new, and appealing. Understanding how to use light is a crucial part of any beginner guide to product photography. Don’t worry, you don’t need expensive studio lights to get fantastic results.
Understanding Light: The Basics
Light behaves in different ways, and knowing these basics will help you control it. We talk about “hard” light and “soft” light. Hard light comes from a small, direct source, like the sun on a clear day, and creates sharp, dark shadows.
Soft light comes from a larger, more spread-out source, like a cloudy day or light passing through a sheer curtain. Soft light creates gentle, subtle shadows and is usually preferred for product photography. It makes your products look smooth and inviting.
The direction of your light also matters a lot. Light coming from the front can flatten your product, while light from the side can add depth and texture. Experimenting with light direction is a great product photography lighting tip.
Natural Light: Your Free Studio
Natural light, especially from a window, is your best friend when you’re starting out. It’s free, beautiful, and often very soft. Look for a large window that gets bright, indirect light throughout the day.
The best time to use natural light is often in the morning or late afternoon. Direct sunlight can be too harsh, so avoid shooting when the sun is directly beaming through your window. A slightly overcast day is actually perfect because the clouds act as a giant natural diffuser.
Place your product near the window, but not directly in the sun. Use a white reflector on the side opposite the window to bounce light back onto your product. This fills in any dark shadows and gives you a beautifully even light.
To make natural light even softer, hang a sheer white curtain over your window. This acts as a giant diffuser, spreading the light out even more. This simple product photography lighting guide step will greatly improve your photos.
Artificial Light: Taking Control
While natural light is wonderful, it’s not always available, especially at night or on very dark days. This is where artificial lights come in. You don’t need professional strobes; many affordable household lights can work great.
Artificial lights give you consistent control over your lighting setup. You can adjust their position, brightness, and direction exactly as you need them. This consistency helps maintain a professional look across all your product photos.
Light Sources for Beginners
You can start with simple desk lamps, LED panels, or even clip-on shop lights. Look for lights that have a “daylight” color temperature (around 5000K-6500K). This color temperature mimics natural daylight and prevents your photos from having a yellow or orange tint.
Ring lights are also a popular choice for product photography. They create a soft, even light around your product and often produce a nice circular reflection in shiny objects. They are easy to use and widely available at different price points.
Whichever light source you choose, make sure it’s bright enough for your needs. You might need one or two lights to start. Remember, even simple lights can create stunning results with the right setup.
One-Light Setup
A one-light setup is the easiest way to start with artificial lighting. Place your light source to one side of your product. This will create some shadows on the opposite side.
Now, grab your reflector (a piece of white foam board works great!). Place the reflector on the side opposite your light source. The reflector will bounce some light back onto your product, filling in those harsh shadows.
This basic setup creates a nice, soft light that highlights your product’s features. It’s an excellent way to learn about how light interacts with your product. You’ll be amazed at the difference a single light and a reflector can make.
Two-Light Setup
Once you’re comfortable with one light, try adding a second light for more control. Your first light is your “main light” – it’s the brightest and positioned to light the primary side of your product. This main light establishes the overall mood and direction of light.
Your second light is your “fill light.” It should be less powerful or placed further away than your main light. The fill light reduces shadows created by the main light, adding more even illumination to your product.
Position the fill light on the opposite side of your product from the main light. This setup helps create a more balanced look and adds depth to your image. It’s perfect for ecommerce photography setup where clear details are important.
Three-Light Setup
For even more professional results, you can use a three-light setup. You’ll have your main light and your fill light, just like before. The third light is often called a “backlight” or “hair light.”
This third light is placed behind your product, often pointing towards its edges. It creates a subtle rim of light around the product, separating it from the background. This technique makes your product really “pop” off the background.
Be careful not to make the backlight too bright, or it can overpower your main light. A little bit of backlight goes a long way in adding dimension and sparkle. This setup gives you ultimate control over shadows and highlights.
Diffusing Your Light
Diffusing your light means making it softer and more spread out. This is crucial for achieving that professional, shadow-free look in your product photos. Soft light flatters almost every product.
Without diffusion, artificial lights can create very harsh, dark shadows. These shadows can be distracting and make your product look less appealing. Think of diffusion as putting a soft cloud between your light source and your product.
DIY Diffusers
You can easily make diffusers using materials you might already have. A sheet of white parchment paper taped over a light source works wonderfully. A thin white bed sheet or a white plastic shower curtain can also be stretched between your light and your product.
Another popular DIY diffuser is a simple white trash bag, stretched thin. The goal is to create a larger surface area for the light to pass through before it hits your product. The bigger the diffuser, the softer the light will be.
You can also buy affordable light diffusers online, often called “softboxes” or “light tents.” These are designed to give you perfectly diffused light every time. They are great for small ecommerce photography setup spaces.
Reflecting Your Light
Reflectors are simple but powerful tools that bounce light back onto your product. They help brighten up the shadowy areas that your main light might miss. This creates a more balanced and evenly lit image.
Think of reflections as helping to “fill in” the dark spots. If you have a light coming from one side, the other side of your product might be too dark. A reflector solves this problem by sending light back into those dark areas.
DIY Reflectors
Creating a DIY reflector is incredibly easy and cheap. A piece of white foam board from an art store is a perfect starting point. You can also use a large piece of white cardstock or even just a clean white towel.
For a slightly brighter reflection, you can cover a piece of cardboard with aluminum foil. Just crinkle the foil a bit before smoothing it out to create a slightly textured surface that diffuses the reflection slightly. These are fantastic product photography lighting tips.
Experiment with placing your reflector at different angles and distances from your product. You’ll see how even small changes can dramatically impact the light and shadows in your photo. It’s a key step in getting that perfect lighting setup.
Building Your DIY Product Photo Studio
You don’t need a fancy professional studio to take amazing product photos. You can create a simple yet effective DIY product photography studio right in your home. This section will guide you through setting up your own space.
Choosing Your Space
The first step is to pick the right spot in your home. Look for an area that has good natural light, if possible, especially near a window. A corner of a room, a tabletop, or even a sturdy box can become your studio.
Make sure the space is clean and uncluttered. You don’t want any messy backgrounds or distractions showing up in your photos. A dedicated space, even a small one, helps you keep things organized and consistent.
Consider the size of your products when choosing your space. Small items will need less room, while larger items might require more elaborate setups. A spare desk or even a kitchen counter can work wonders.
The Light Box / Light Tent
A light box, also known as a light tent, is a fantastic tool for beginners. It’s a simple box, often with white or translucent sides, that creates a soft, even light all around your product. This helps eliminate harsh shadows and backgrounds.
Light boxes are especially great for small to medium-sized products. They provide a controlled environment, making it easier to get consistent lighting every time. This consistency is vital for an ecommerce photography setup.
How to Make a Simple Light Box
You can easily make a DIY light box. Start with a cardboard box and cut out windows on the top and sides. Line the inside of the box with white poster board or paper.
Cover the cut-out windows with thin white fabric or parchment paper – this will be your diffuser. Shine your lights through these diffused windows onto your product inside the box. You’ll get beautifully soft, even light from all directions.
You can find many tutorials online for building a DIY product photo studio light box with simple materials. They are a game-changer for beginners. This setup helps you achieve professional-looking photos without much fuss.
Simple Background Setups
Beyond a light box, there are other easy ways to create great backgrounds. The goal is always to keep the focus on your product. Simple backgrounds are your best friend here.
Paper Sweep
A “paper sweep” is a classic technique. It involves using a large sheet of seamless paper (like craft paper or a roll of white butcher paper). You gently curve the paper from the tabletop up against a wall.
This creates a seamless background without any harsh lines or corners. Your product appears to float in a clean, infinite space. White, gray, or black paper are excellent choices for this setup.
You can buy large rolls of paper specifically for photography, or just use large sheets of craft paper. Just make sure the paper is clean and free of wrinkles. This setup is highly versatile for different ecommerce photography setup needs.
Fabric Drapes
Another simple background option is using fabric. A plain white, gray, or black sheet or piece of fabric can create a soft, textured background. Drape it smoothly behind and under your product.
Velvet fabrics can add a touch of luxury, while linen can give a more natural feel. Just be careful with patterns, as they can distract from your product. Iron your fabric backgrounds beforehand to remove any wrinkles.
Experiment with different fabric textures to see what works best for your product. You can pin the fabric to a wall or hang it over a stand. This adds a nice touch to your DIY product photography studio.
Contextual Backgrounds
Sometimes, you want to show your product in a more realistic setting. This is called a contextual background. For example, if you’re selling a coffee mug, you might place it on a wooden table with some coffee beans.
Contextual backgrounds help tell a story about your product and how it’s used. Just make sure the background elements don’t overwhelm your product. Keep it simple and relevant to your item.
Use real-life elements that fit your product’s purpose or aesthetic. This can make your product more relatable to potential customers. It’s a great way to add personality to your beginner guide to product photography skills.
Setting Up Your Shot: Tips for Perfect Photos
Once your studio and lighting are ready, it’s time to set up your product and take the actual photos. These tips will help you make sure every shot is crisp, clear, and perfectly focused. This is where your beginner guide to product photography really comes to life.
Camera Settings for Beginners
Don’t be intimidated by camera settings; we’ll focus on just a few key ones. Even if you’re using a smartphone, understanding these basics will help you take better pictures. Most smartphone cameras have “Pro” or “Manual” modes that let you adjust these.
Focus
Making sure your product is sharp and in focus is probably the most important setting. If your product is blurry, the photo won’t look professional. With a smartphone, you usually just tap on your product on the screen to focus.
For DSLRs, learn how to use “autofocus” to lock onto your product. Often, using a single autofocus point placed directly on your product gives the best results. A tripod also helps keep everything still, so your focus stays exactly where you want it.
Make sure to focus on the most important part of your product. If it’s a piece of jewelry, focus on the gemstone. If it’s a book, focus on the title.
Exposure
Exposure refers to how bright or dark your photo is. If your photo is too dark, it’s underexposed; if it’s too bright, it’s overexposed. You want your product to be perfectly lit, not too dim or washed out.
Most cameras and phones will try to set exposure automatically. However, you can often adjust it manually using an “exposure compensation” slider (looks like +/-). Play around with it until your product looks perfectly bright.
Remember, it’s often better to slightly underexpose and brighten later than to overexpose and lose details. This is an important product photography lighting tip for clean results.
White Balance
White balance tells your camera what “white” should look like under different lighting conditions. Different light sources (sunlight, fluorescent bulbs, LED lights) have different color casts. If your white balance is off, your whites might look yellow, blue, or green.
Most cameras have automatic white balance (AWB), which works well most of the time. However, if your photos have a strange color tint, you might need to adjust it. Look for white balance presets like “daylight,” “cloudy,” “fluorescent,” or “incandescent.”
You can also use a “custom white balance” setting if your camera has one. This involves taking a picture of a white card under your specific lighting. This tells the camera exactly what white should be, ensuring true colors for your product.
Product Placement & Angles
How you place your product and the angle you shoot from makes a huge difference. Think about what makes your product unique and try to highlight those features. Don’t just place it flat and shoot from above.
Showcase different sides and details of your product. People want to see it from all angles. For example, if you’re selling a mug, show the handle, the design, and the inside.
Rule of Thirds
The “rule of thirds” is a simple compositional guideline. Imagine your image is divided into nine equal squares by two horizontal and two vertical lines. Placing your product or key elements along these lines or at their intersections often creates a more visually interesting photo.
Instead of putting your product dead center every time, try shifting it slightly. This adds dynamic interest to your shots. Many cameras and smartphones have a grid overlay you can turn on to help you visualize these lines.
Experiment with different placements. Sometimes, a centered shot is perfect, but don’t be afraid to break the rules once you understand them.
Multiple Angles
Don’t just take one picture! Shoot your product from many different angles. A straight-on shot is good, but also try shooting slightly from above, from below, or at an angle.
Get close-up shots to show texture and fine details. Step back for a wider shot that includes the whole product and perhaps a prop. Offer a variety of views to your customers, just like they would pick up and examine an item in a physical store.
Think about the unique features of your product. If it has an interesting back, make sure to photograph it. This comprehensive approach is essential for a good ecommerce photography setup.
Cleaning Your Product
This might seem obvious, but it’s often overlooked. Before you even think about taking a picture, thoroughly clean your product. Dust, fingerprints, and smudges will show up clearly in photos.
Use a lint-free cloth or a small brush to remove any dust. For shiny items, use a microfiber cloth to wipe away fingerprints. A clean product makes a huge difference in the final image.
It’s much easier to clean your product before shooting than trying to fix imperfections later in editing. This simple step saves you a lot of time and effort. It’s a fundamental part of any beginner guide to product photography.
Taking Multiple Shots
Take many, many photos! Digital photography is free, so there’s no reason to be shy with the shutter button. The more photos you take, the better your chances of getting a perfect one.
Vary your angles slightly, try different lighting positions, and adjust your product. Even small changes can result in a completely different look. You can always delete the ones you don’t like later.
Think of it as casting a wide net. You’re trying to capture the best possible image, and sometimes that takes many attempts. This approach is key to improving your skills in your DIY product photography studio.
Post-Processing: The Final Touch
Once you’ve taken your photos, the work isn’t quite over. Post-processing, or editing, is like adding the finishing touches to your masterpiece. It helps make your good photos look great and your great photos look amazing.
Don’t worry, you don’t need expensive software or advanced skills. Simple edits can make a huge difference. Editing is an important step in ecommerce photography setup to ensure consistency.
Simple Edits
Just a few quick adjustments can dramatically improve your product photos. Focus on these basic edits first.
Cropping
Cropping means trimming the edges of your photo to remove distractions and improve the composition. You want your product to be the main focus, without too much empty space around it. Crop your image to remove any unwanted background elements or to center your product better.
Many online marketplaces have specific aspect ratio requirements (e.g., square for Instagram). Cropping helps you fit your photos to these specifications. It’s an easy way to make your photos look more professional and tidy.
Brightness/Contrast
Sometimes photos can look a little dull or flat straight out of the camera. Adjusting the brightness makes your photo lighter or darker. Adjusting contrast makes the dark parts darker and the light parts lighter, adding “pop.”
Increase brightness if your photo is too dark, and decrease it if it’s too bright. A slight increase in contrast can make your product look more vibrant and dimensional. Be careful not to overdo it, or your photo can look unnatural.
Color Correction
If your colors look a bit off (perhaps too yellow or too blue), you can correct them. This often involves adjusting the “white balance” or “color temperature” slider in your editing app. The goal is to make colors look true-to-life.
Make sure your product’s colors are accurate, especially if color is an important selling point. Customers rely on accurate representation when shopping online. This ensures that what they see is truly what they get.
Free Editing Tools
You don’t need to buy expensive software like Adobe Photoshop to edit your product photos. There are many fantastic free options available. Many of these tools are perfect for a beginner guide to product photography.
For smartphone users, apps like Snapseed (Google), Adobe Lightroom Mobile (free version), or even the built-in photo editor on your phone offer powerful features. They let you crop, adjust brightness, contrast, and colors with ease. These apps make on-the-go editing simple and effective.
On your computer, GIMP is a free, open-source alternative to Photoshop. Canva also offers great photo editing tools in its free version, perfect for quick adjustments and adding text. You can also find many free online photo editors like Pixlr or Fotor that work directly in your web browser. These tools are excellent for enhancing your DIY product photography studio results.
Advanced Tips for Your Product Photography Journey
As you get more comfortable with the basics, you might want to try some more advanced techniques. These tips will help you take your product photos to the next level. They build upon the core principles of your beginner guide to product photography.
Lifestyle Shots
Lifestyle shots show your product being used in a real-world setting. Instead of just a plain white background, imagine a candle lit on a cozy bookshelf. Or a piece of jewelry worn by a person.
These photos help customers imagine themselves using your product. They add context and emotion, making the product more appealing. Lifestyle shots can be incredibly powerful for engaging your audience.
You can create simple lifestyle shots using everyday items around your home. Just remember to keep the product as the main focus. The surrounding elements should enhance, not distract.
Using Props
Props are small items you can include in your photos to add interest, context, or scale. For example, if you’re selling coffee beans, you might include a coffee cup and a spoon. Or, if you’re selling a handmade soap, a small, dried flower can add a nice touch.
Choose props that are relevant to your product and don’t overwhelm it. The props should complement your item, not compete with it for attention. They can help tell a story about your product.
Less is often more when it comes to props. A few well-chosen items are usually better than too many. This is a subtle but effective product photography lighting tip because props can influence how light falls on your main product.
Consistency
Consistency in your product photos builds a strong brand image. Try to keep your lighting, backgrounds, and editing style similar across all your products. This makes your online store look cohesive and professional.
For example, if you decide to use a white background and soft, even lighting, try to apply that to all your product shots. This creates a uniform look that customers will recognize and trust. Consistent ecommerce photography setup is key for a branded look.
Creating a style guide for your photos can be helpful. This might include preferred backgrounds, lighting setups, and editing presets. Consistency helps your brand stand out and look polished.
Product Photography Checklist
Here’s a quick checklist to help you remember the key steps for your perfect product photos:
- Clean your product thoroughly. No dust or fingerprints!
- Clean your camera lens. A smudged lens means blurry photos.
- Set up your lighting. Natural light from a window or artificial lights with diffusers.
- Use a reflector to fill in shadows.
- Choose a simple, clean background.
- Use a tripod for sharp, steady shots.
- Adjust camera settings: focus, exposure, white balance.
- Experiment with product placement and angles.
- Take many photos from different perspectives.
- Review and select your best shots.
- Edit your photos: crop, adjust brightness/contrast, correct colors.
- Save and upload your amazing new product photos!
Common Product Photography Mistakes to Avoid
Even with a good beginner guide to product photography, mistakes happen. Here are some common pitfalls to watch out for, so you can avoid them:
- Poor Lighting: This is the number one mistake. Too dark, too bright, or harsh, uneven shadows can ruin a photo. Always prioritize soft, even lighting.
- Blurry Photos: Shaky hands or incorrect focus lead to blurry images. Use a tripod and tap to focus on your product.
- Distracting Backgrounds: Cluttered or busy backgrounds pull attention away from your product. Keep it simple and clean.
- Inconsistent Photos: Different lighting, backgrounds, or editing styles across your products make your store look messy. Strive for a consistent look.
- Not Enough Photos: Only one or two photos don’t give customers enough information. Offer multiple angles and close-ups.
- Wrong Colors: If your product’s color is off, customers might be disappointed. Ensure accurate white balance and color correction.
- Dirty Products: Dust, lint, or fingerprints are easily visible in high-quality photos. Clean your product every time.
- Using Camera Flash: The built-in flash on your camera or phone often creates harsh light and ugly shadows. Avoid using it directly on your product.
Frequently Asked Questions (FAQ)
What’s the best lighting for product photography?
For beginners, the best lighting is natural window light. It’s free, soft, and easy to use. Just place your product near a window, out of direct sunlight, and use a white reflector to fill in shadows.
Can I use my phone for product photography?
Absolutely! Modern smartphones have excellent cameras that are perfect for product photography. Just make sure your lens is clean, use good lighting, and consider a small tripod for stability. Many professional-looking product photos are taken with phones.
How do I make a DIY light box?
You can make a simple DIY light box from a cardboard box. Cut out windows on the sides and top, then line the inside with white paper. Cover the windows with thin white fabric or parchment paper to diffuse your lights. Place your product inside for soft, even lighting.
What background is best for product photography?
A plain white or light gray background is often best for product photography, especially for ecommerce photography setup. It keeps the focus entirely on your product and makes it easy to cut out if needed. You can use large sheets of paper or white foam board.
How can I make my product photos look professional?
To make your photos look professional, focus on three key things:
- Excellent Lighting: Soft, even light is crucial.
- Clean Setup: A simple, uncluttered background and a spotless product.
- Sharp Focus: Ensure your product is perfectly in focus and not blurry. Editing your photos slightly to adjust brightness and contrast also helps a lot.
Conclusion
You’ve now completed your beginner guide to product photography! Taking great photos of your products doesn’t have to be complicated or expensive. With simple tools, good lighting, and a bit of practice, you can create stunning images that attract customers. Remember the power of a perfect lighting setup and a clean background.
Start with what you have – your smartphone, some natural light, and a white sheet. Experiment with different setups and angles. Every time you practice, you’ll get better and better.
Good luck with your product photography journey! We hope this guide helps you create amazing pictures that make your products shine. Your DIY product photo studio is just waiting to be set up.


Leave a comment